Generating Gain Sequences with Adaptive Background Attenuation (ABA)#
See Dynamic Gain
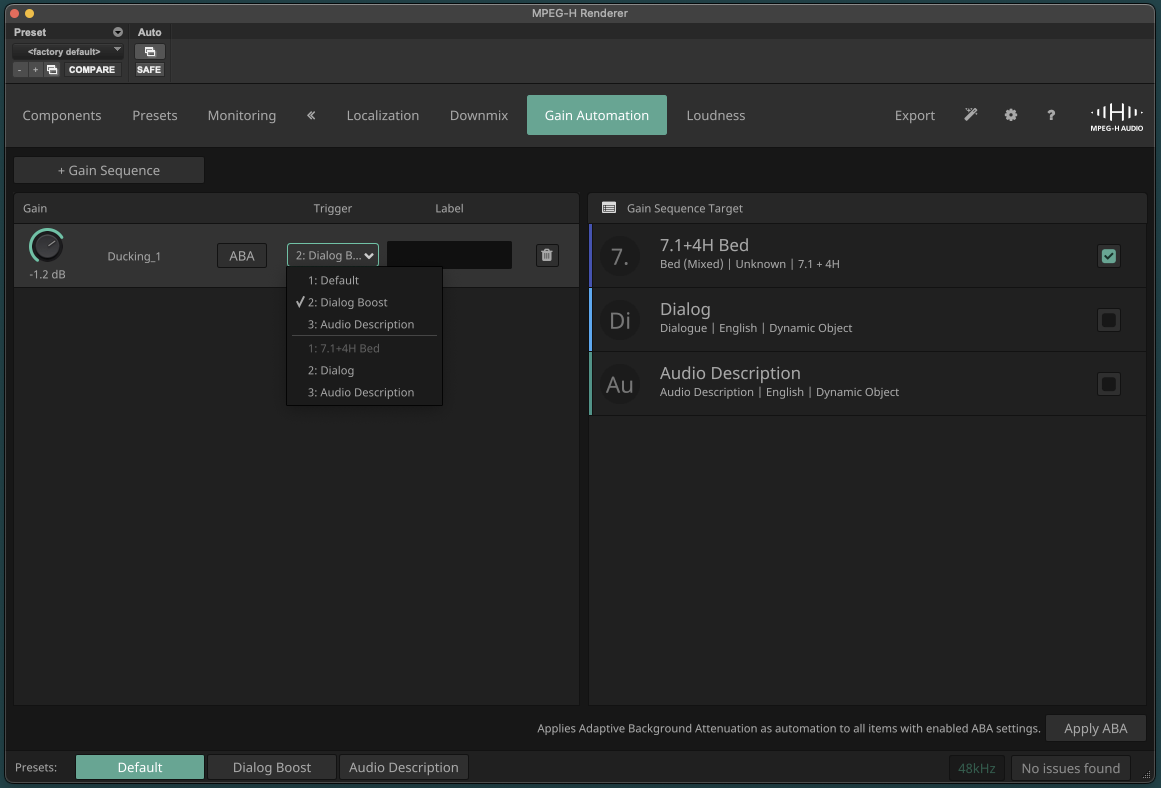
In the MPEG-H Renderer, navigate to the “Gain Automation” tab.
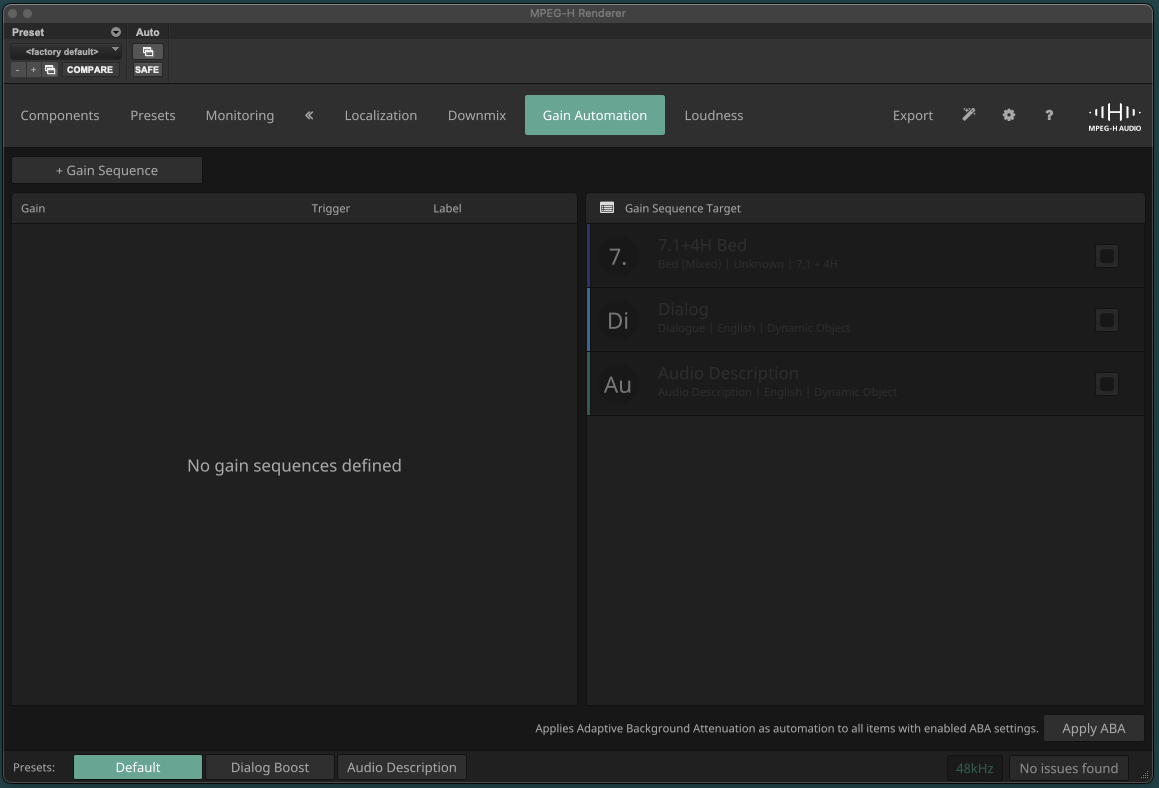
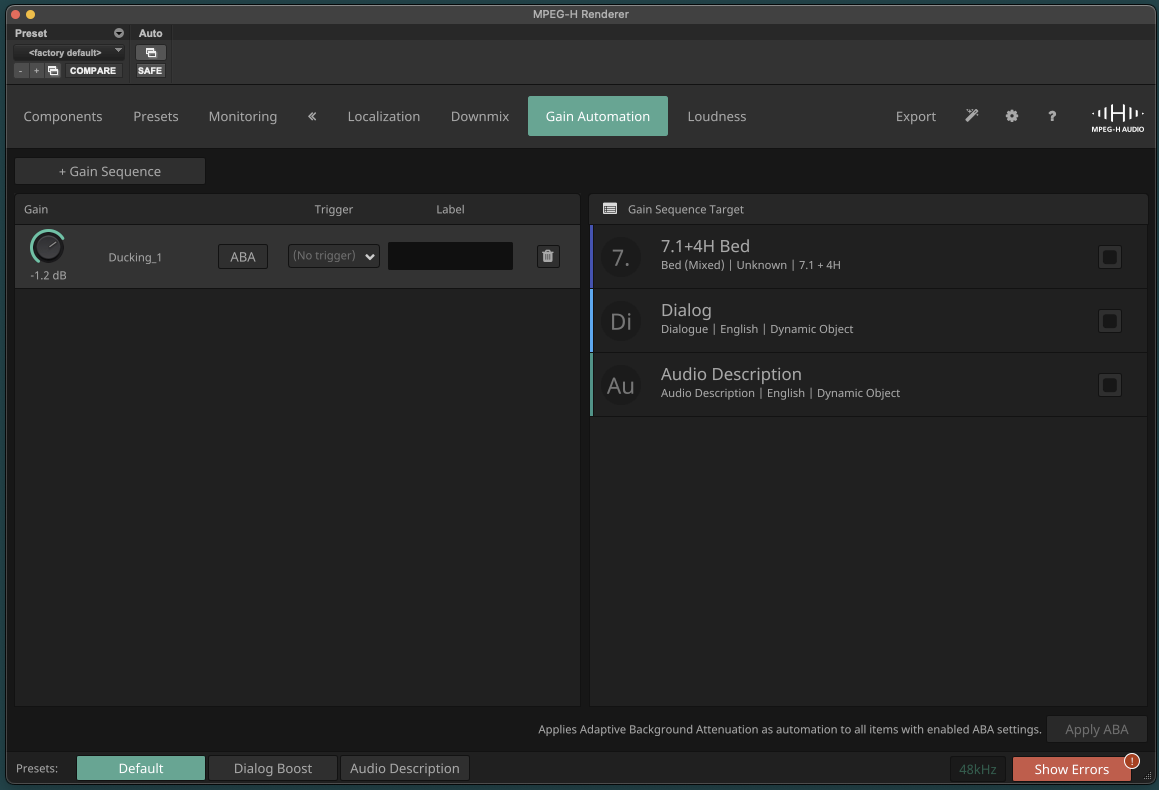
Click the “+ Gain Sequence” button to create a new gain sequence.
Click the “Trigger” dropdown menu and select your trigger, i.e., the component or preset which serves as the condition for applying this gain sequence.
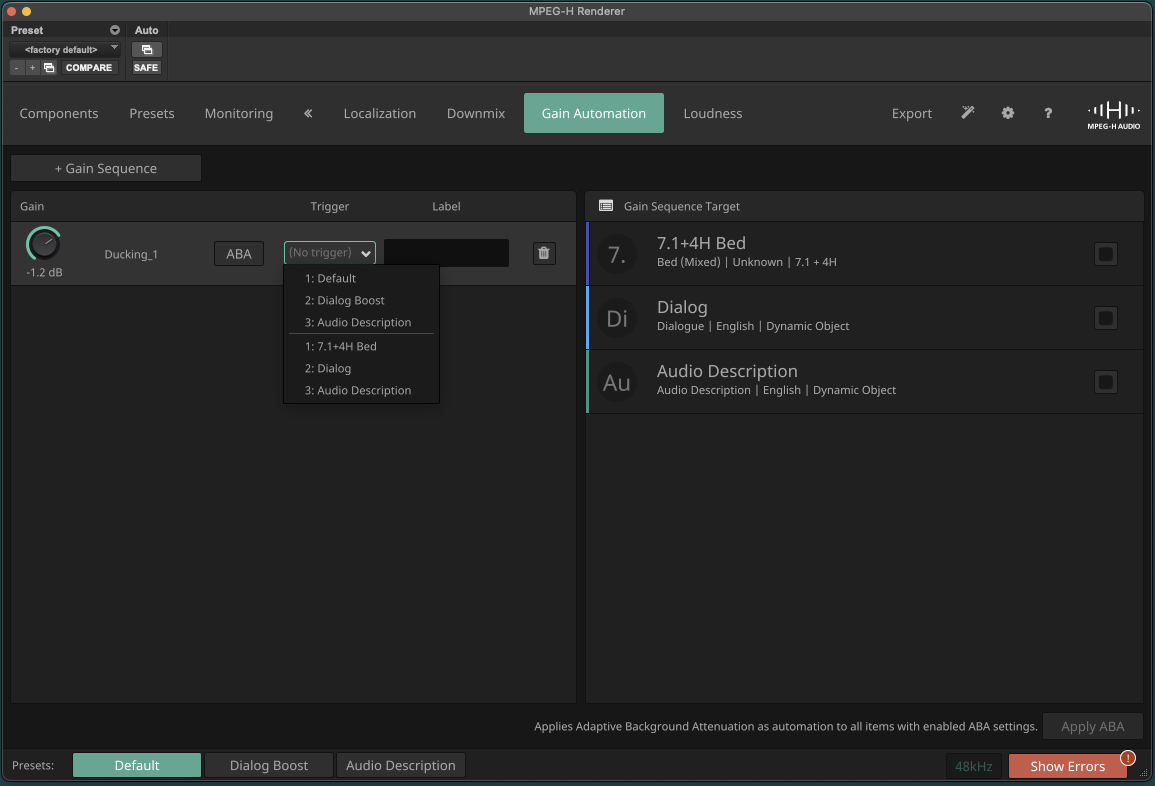
Select your gain sequence target(s) on the right side. The target defines, which components are being attenuated when the trigger is active. Multiple targets can be selected. In this example, the trigger is the Dialog Boost preset and the target is the 7.1+4H Bed.
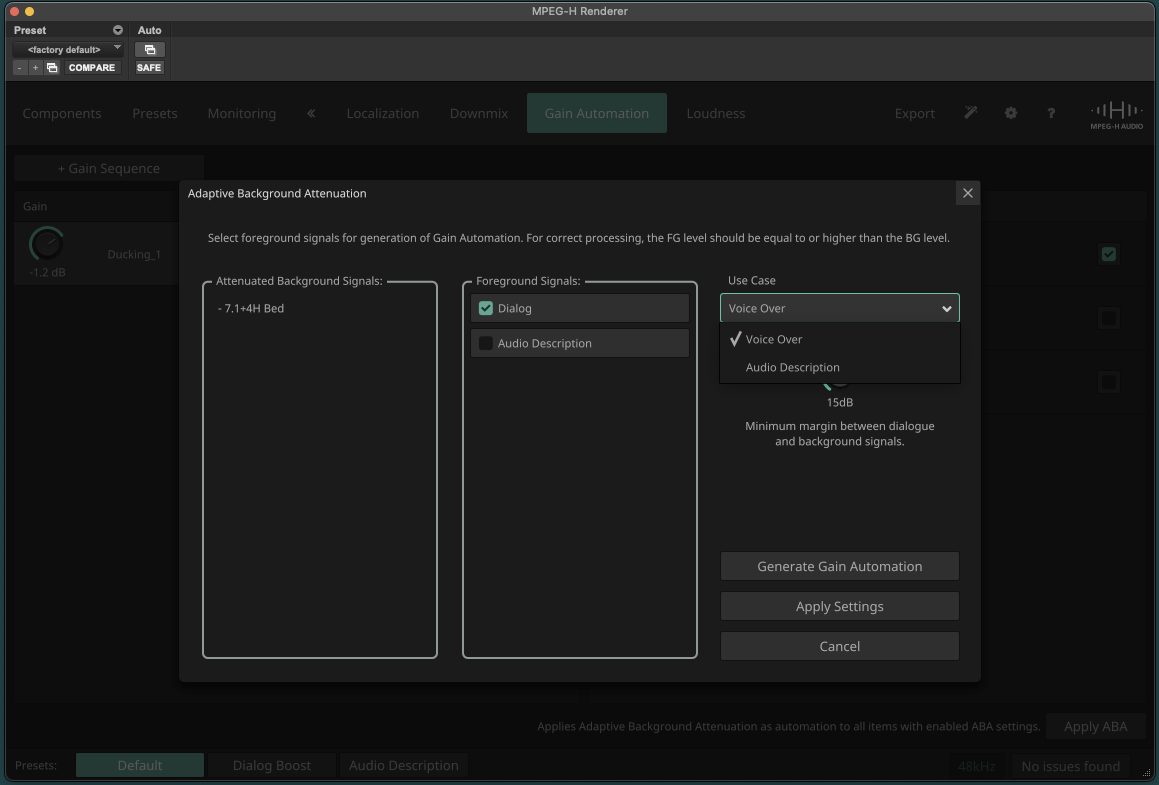
Click the ABA button to open the ABA settings menu. On the left, you can see which components have been selected as background targets. The middle column shows the remaining components that have not been set as targets. Select which foreground signal(s) will be used to calculate the neccessary gain values to achieve the desired margin between foreground and background.
Select either “Voice Over” or “Audio Description”. “Voice Over” uses smooth timing to mimic a natural, human-like mixing behaviour. “Audio Description” uses very short attack and release times to ensure that speakers can make the most of even the shortest pauses.
Below that, the “Clearance” can be set. Clearance is the minimum margin between dialogue and background signals. The higher the clearance value, the stronger the attenuation of the background.
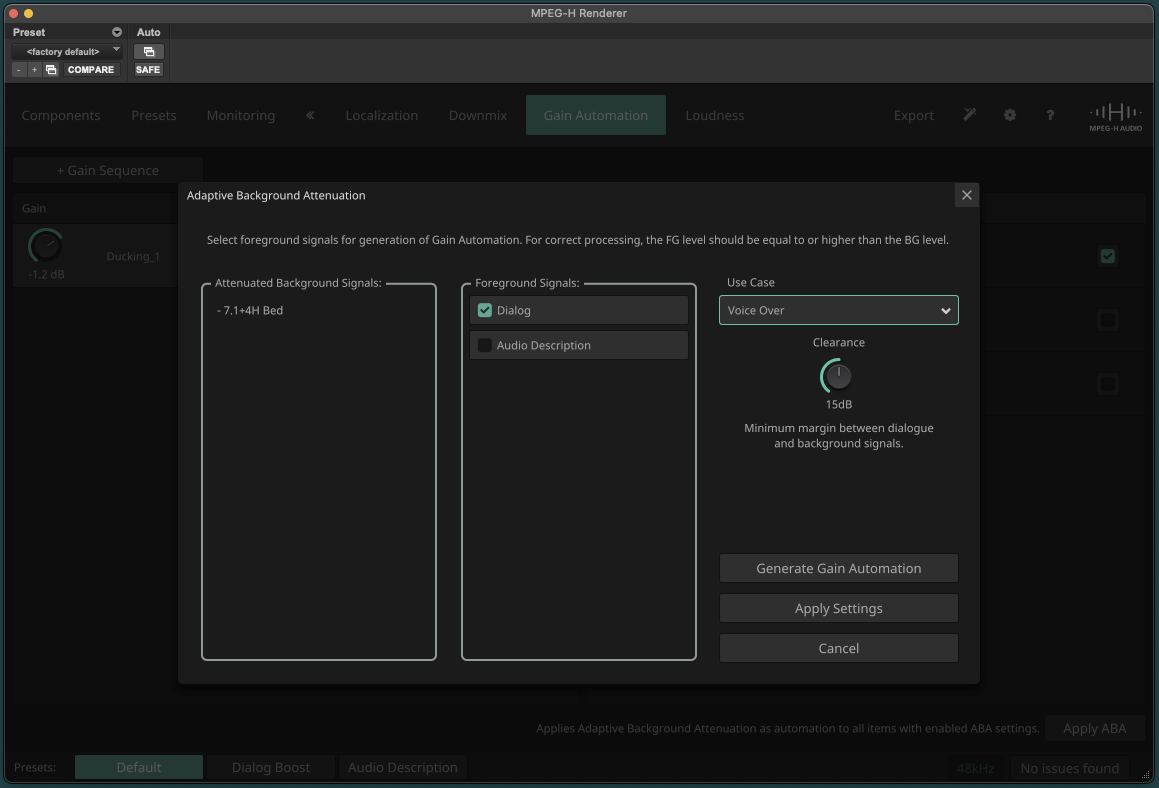
After setting the clearance, click “Generate Gain Automation” to automatically create an automation curve that reduces the background noise with the given clearance whenever there is a signal in the foreground. To create multiple gain sequences, click “Apply Settings” to save the settings of this gain sequence.
If you have created multiple gain sequences and want them generated all at once, click “Apply ABA” in the bottom right corner.
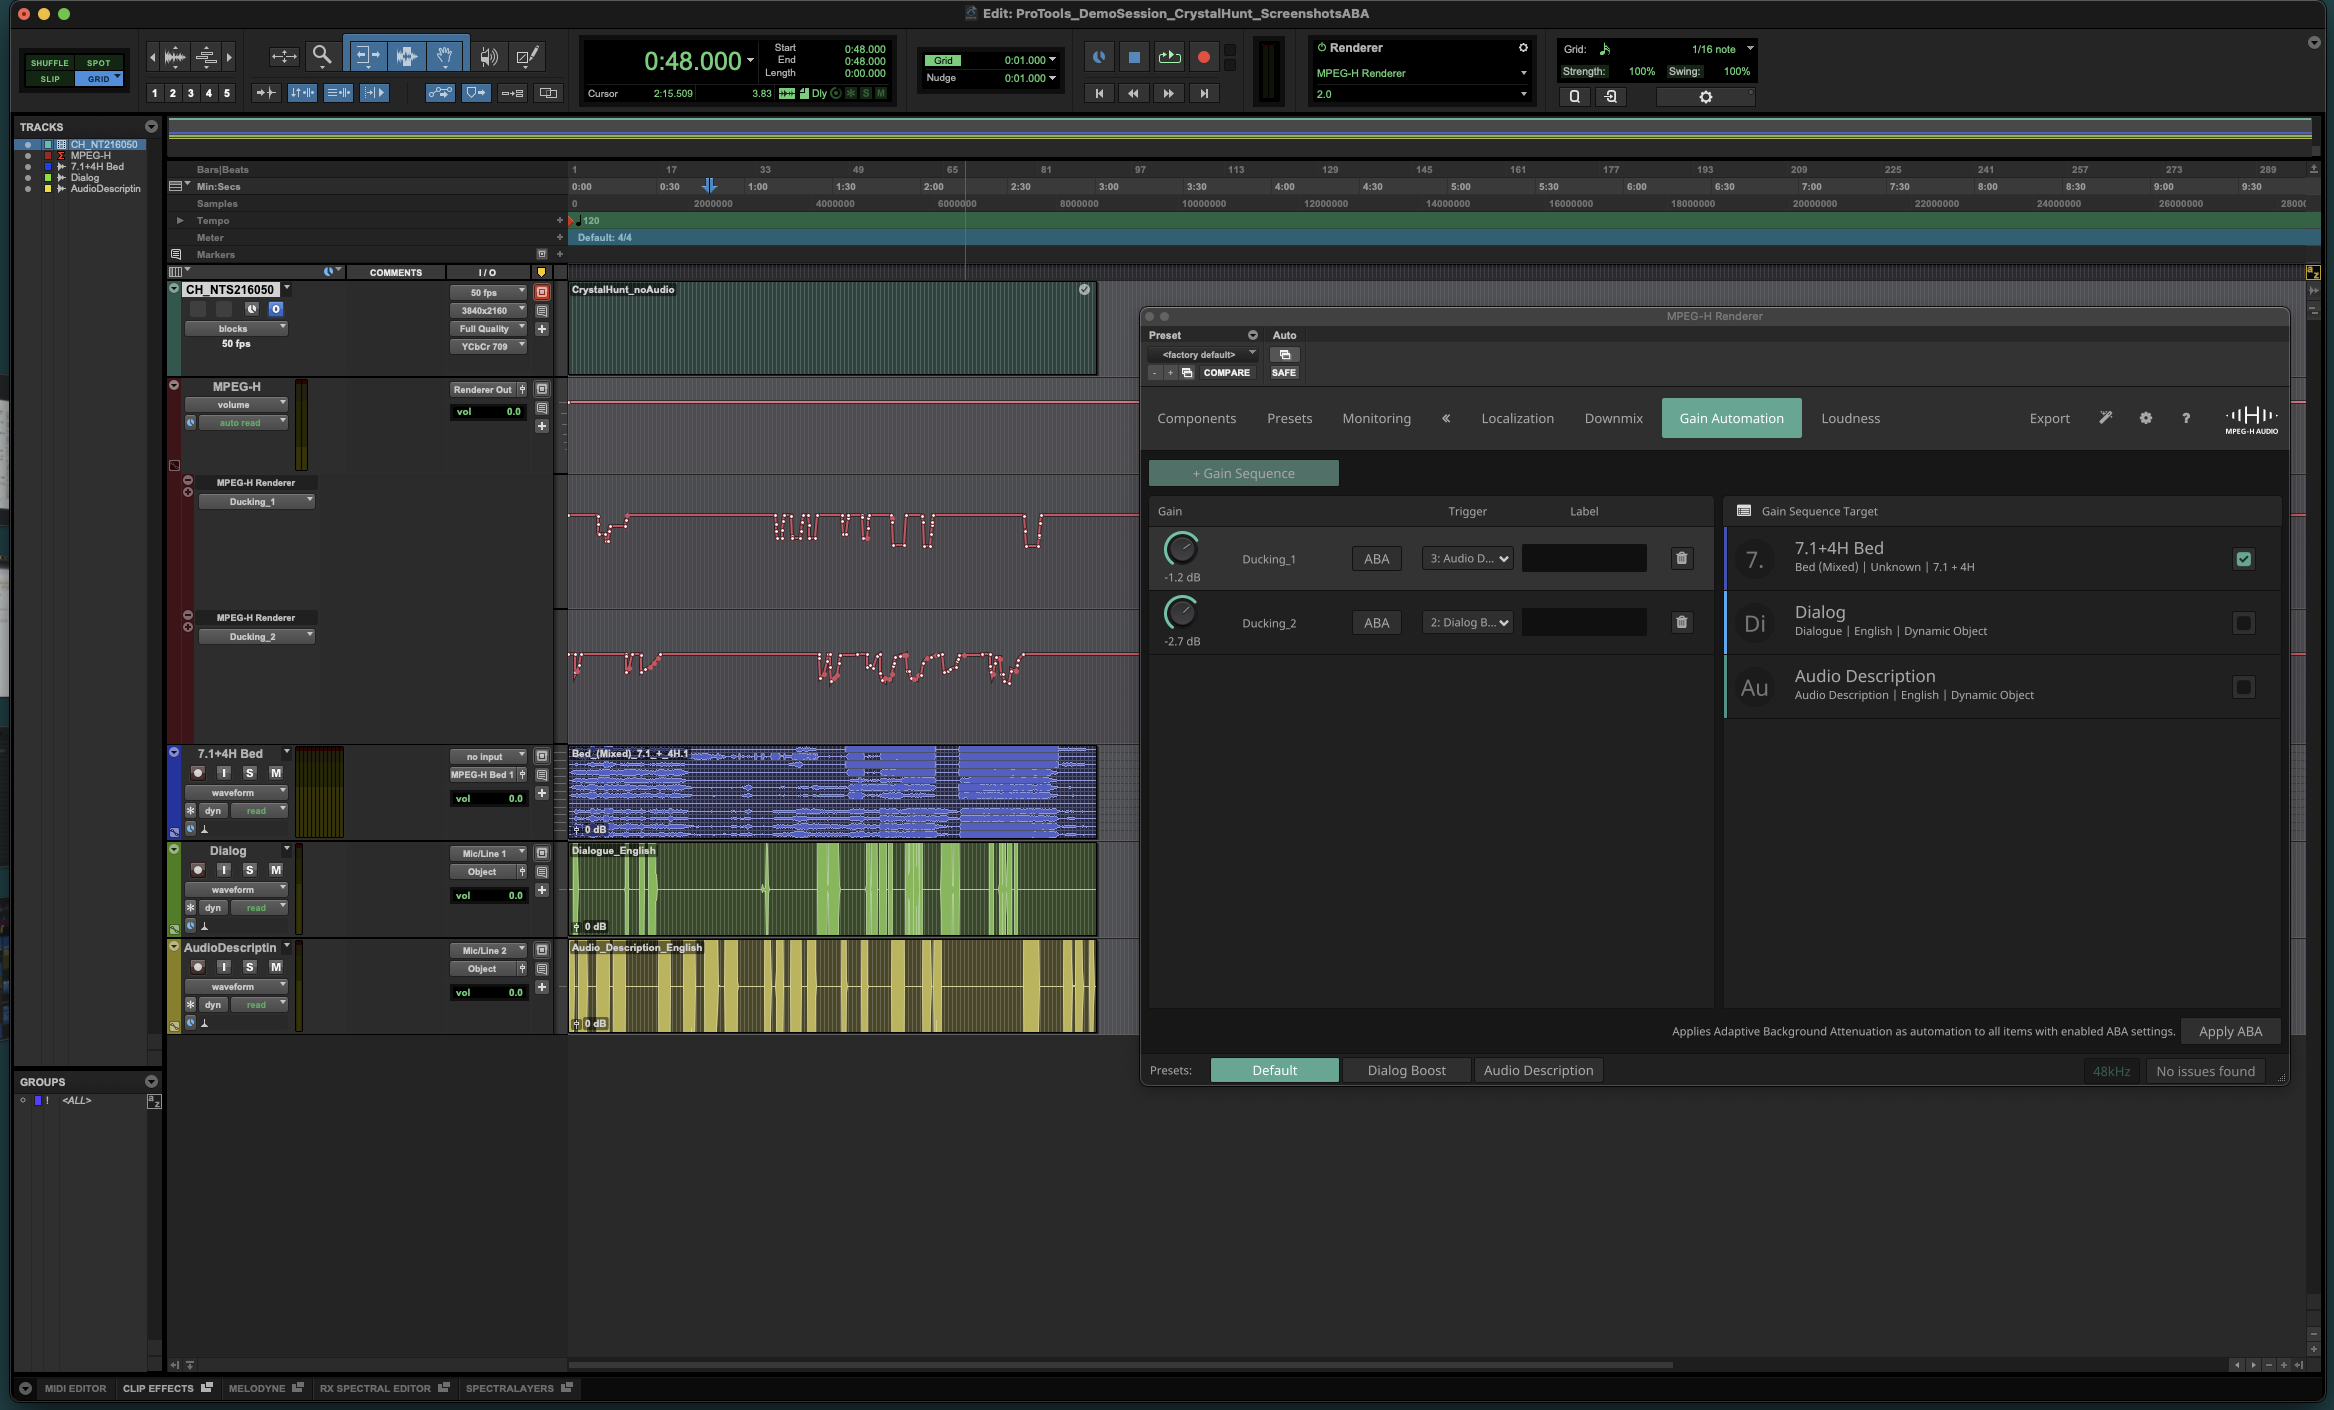
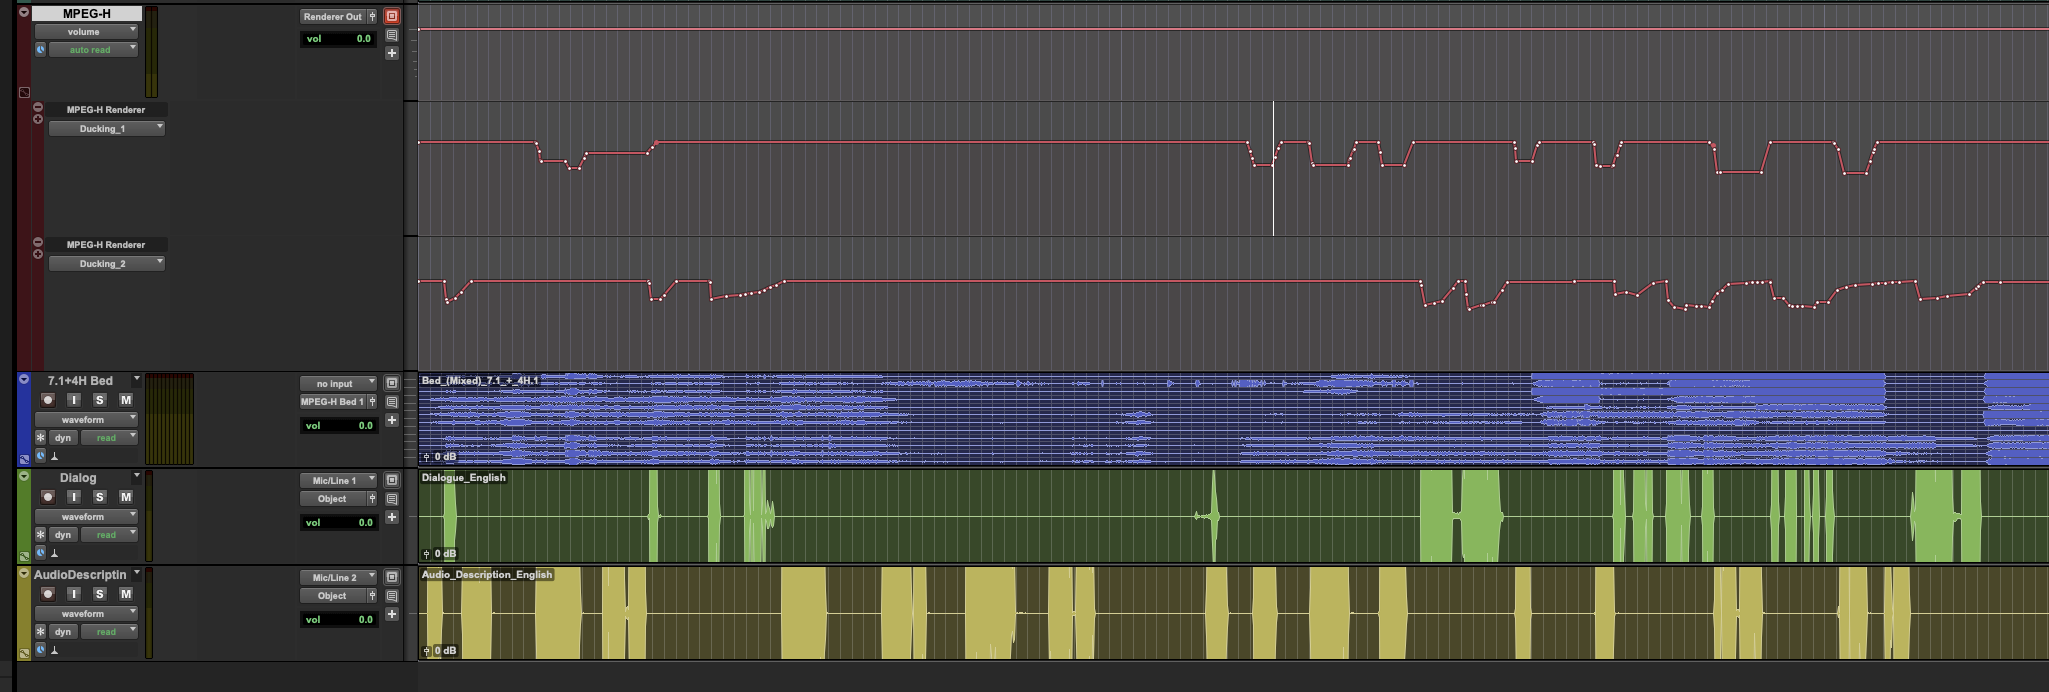
You will find the generated automation data on the automation lanes of the MPEG-H Renderer Master Track labeled “Ducking_1”, “Ducking_2”, and so on. You can now check and manually edit the created gain automation if necessary.